5 Essential Steps for Water Damage Cleanup: What Every Homeowner Should Know

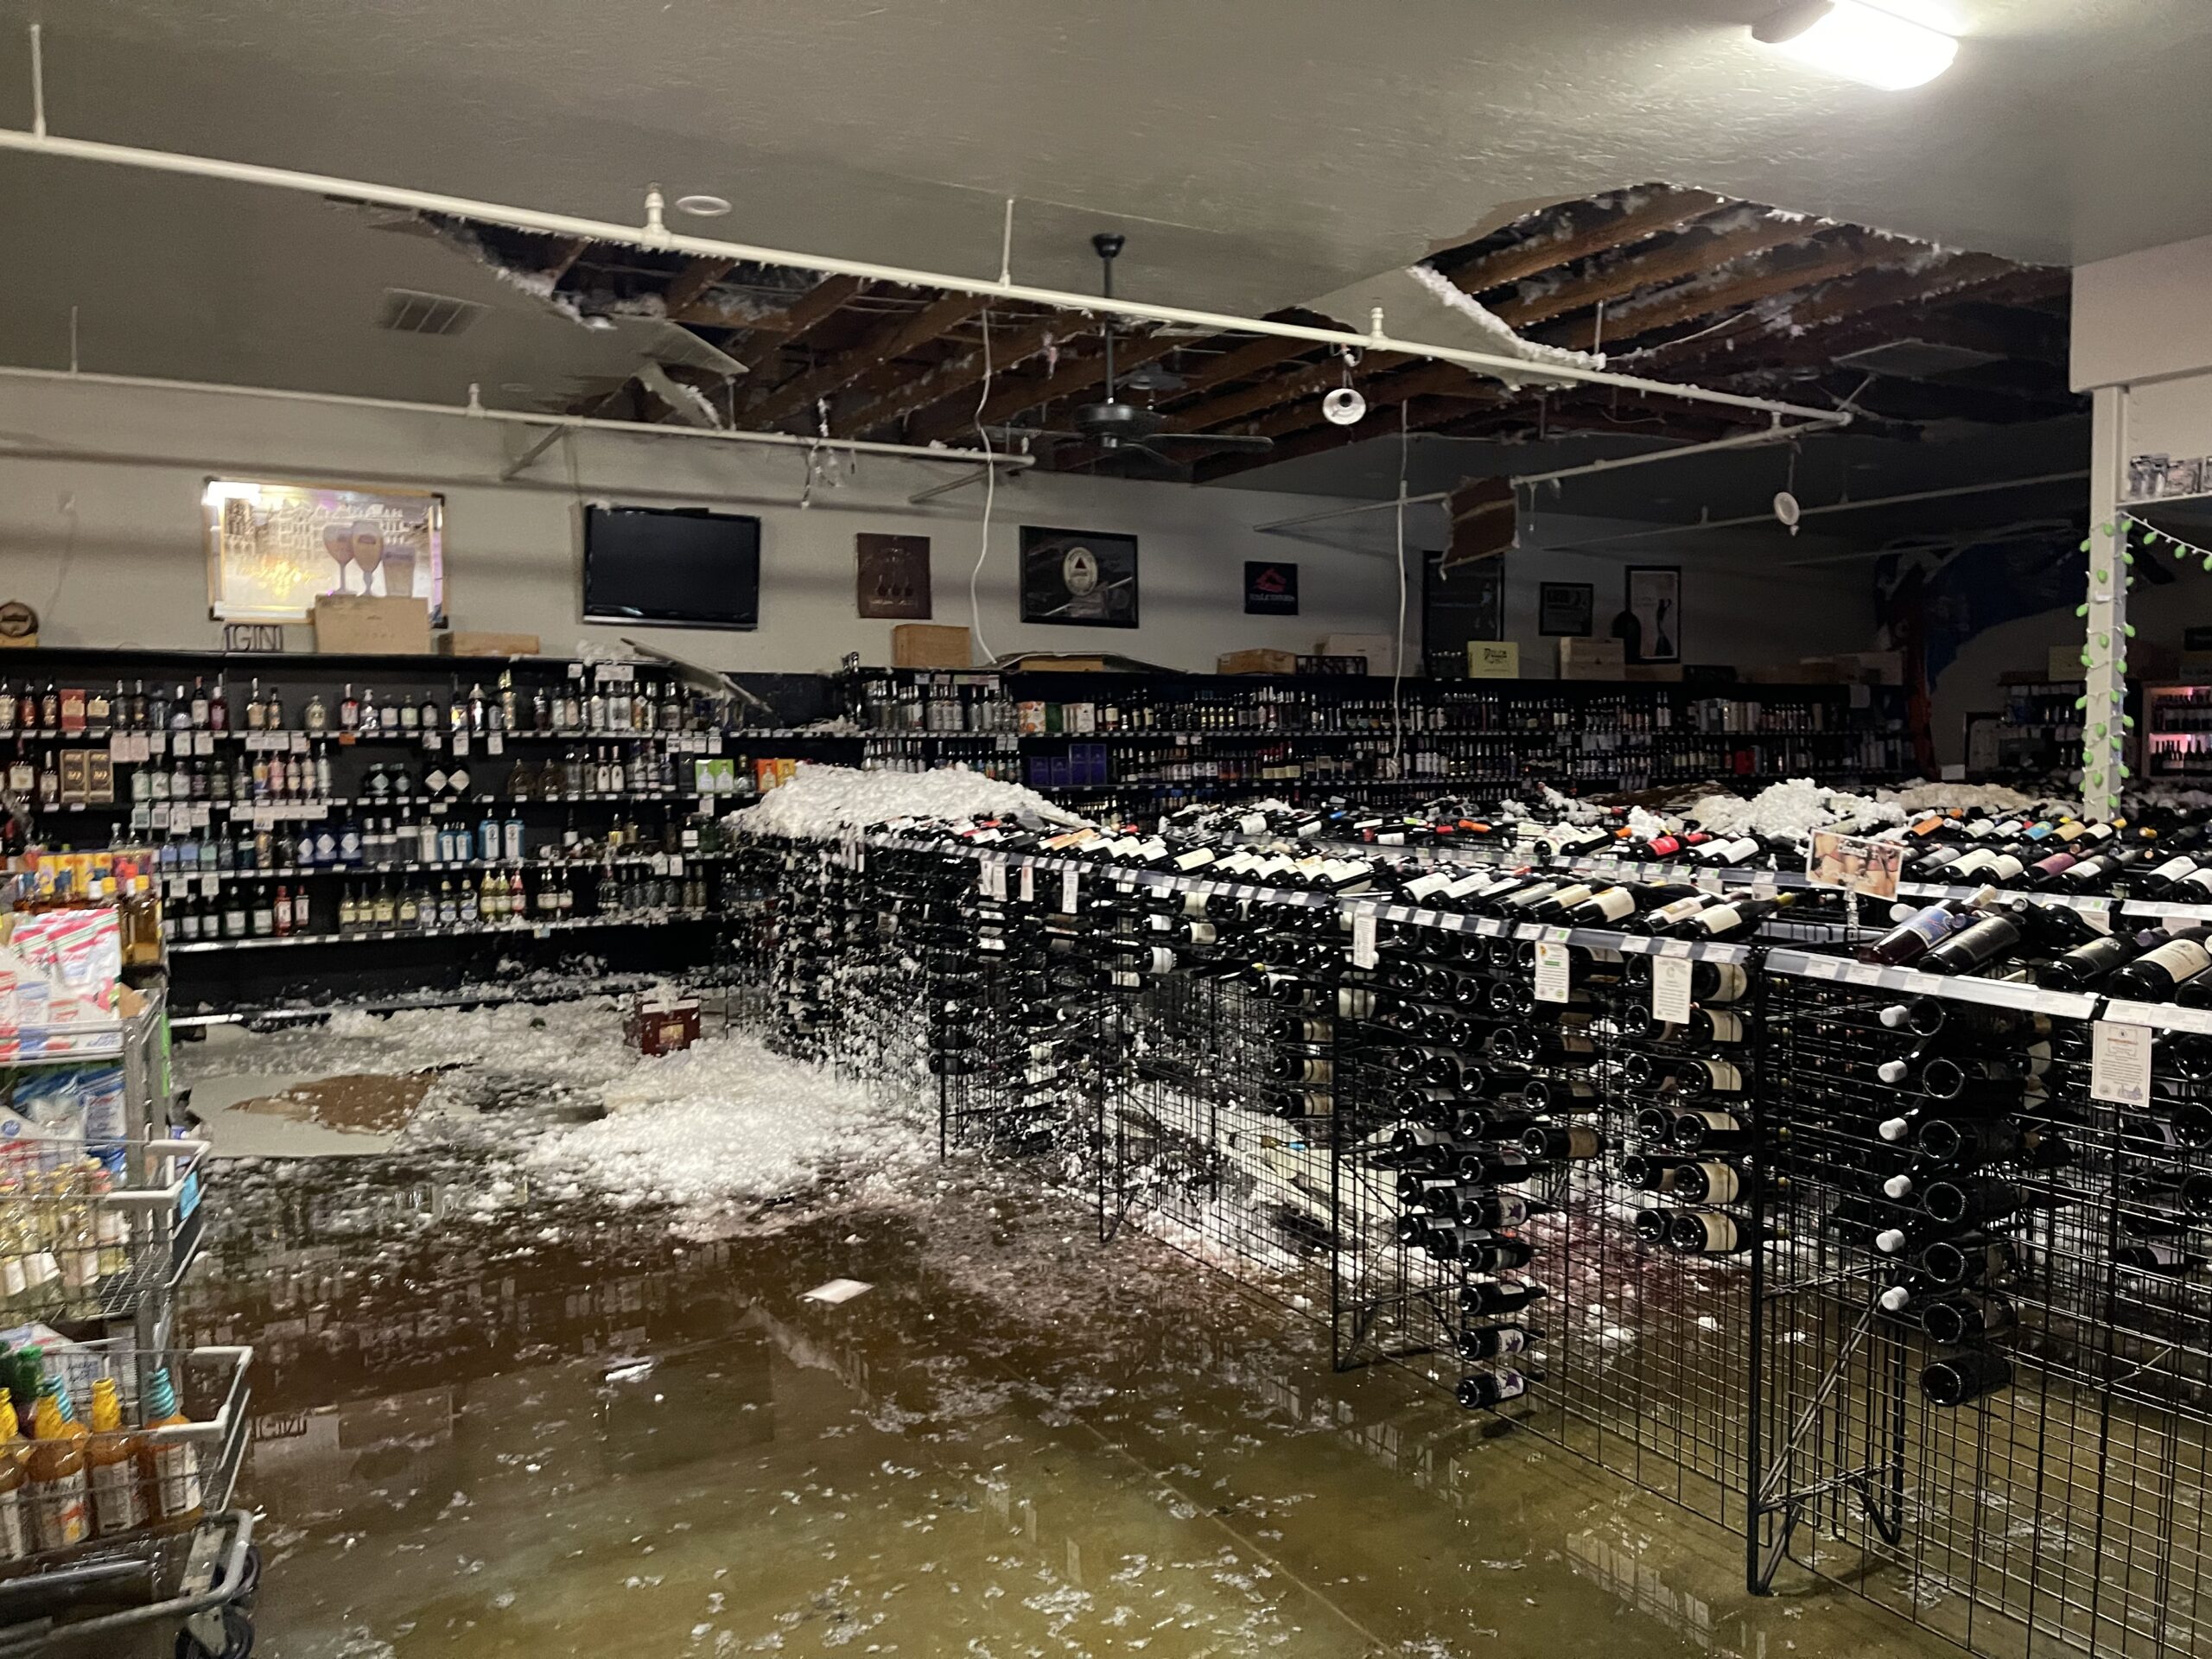
Water damage is every homeowner’s nightmare. Whether it’s a burst pipe, a flooded basement, or a leaky roof, water can ruin your belongings, weaken your home’s structure, and even create health risks like mold. But here’s the good news: acting quickly and smartly can save your home and your wallet!

In this guide, we’ll walk you through 5 simple, actionable steps to tackle water damage like a pro. No jargon, no overwhelm—just clear advice to get your home back to normal. Let’s dive in!

Key Takeaways

1. Safety first! Turn off electricity and avoid contaminated water.

2. Stop the water source to keep things from getting worse.

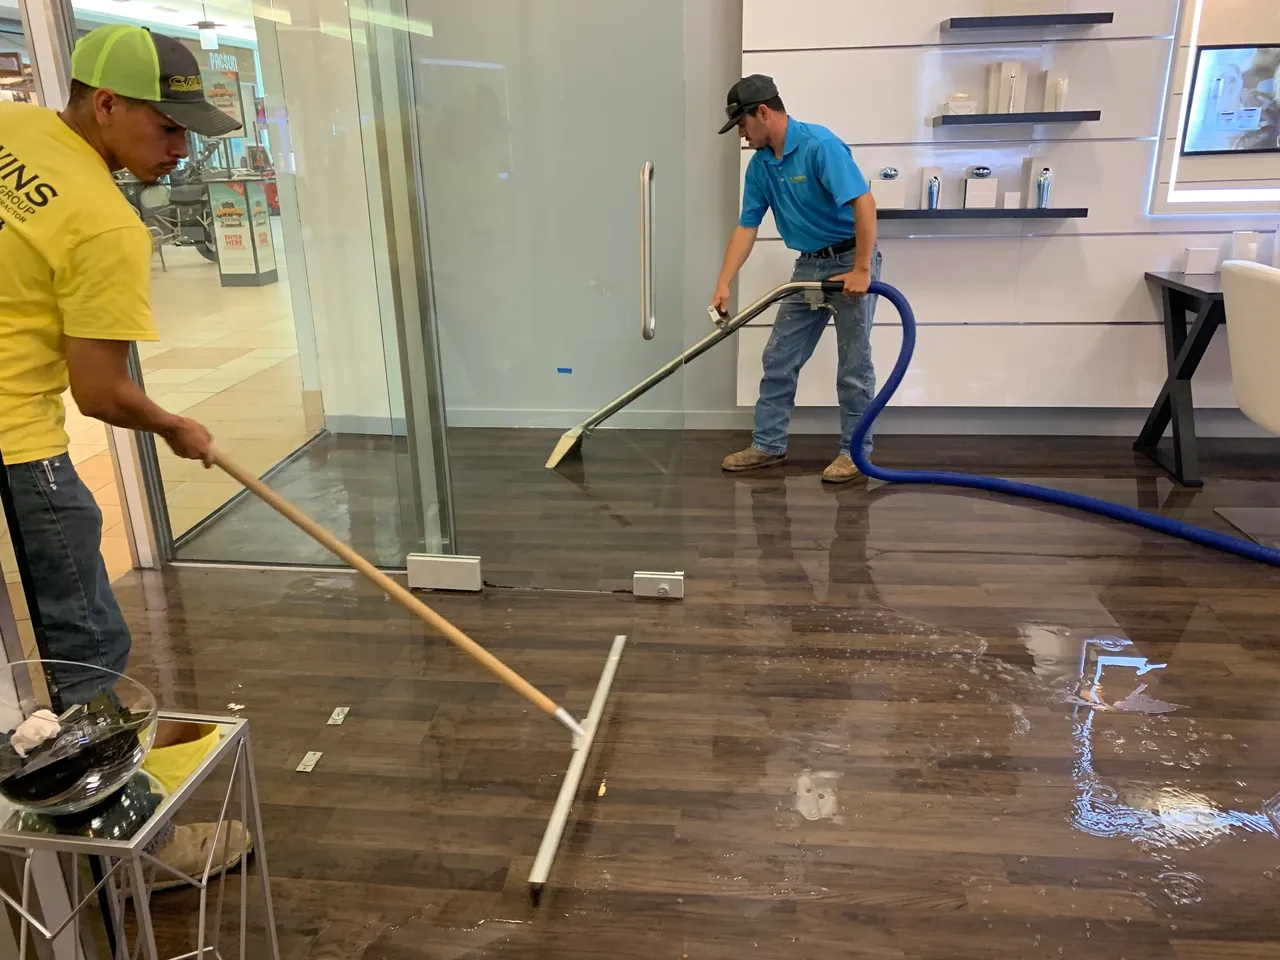
3. Get rid of standing water ASAP with pumps, vacuums, or towels.

4. Dry everything with fans, dehumidifiers, and sunlight.

5. Clean and disinfect to stop mold and bacteria growth.

Step 1: Stay Safe (Your #1 Priority!)

Before you grab a mop, protect yourself and your family. Water damage often comes with hidden dangers:

What to Do:

  • Turn off the electricity at the main breaker. Water and live wires do not mix.
  • Wear protective gear: Protective equipment including rubber gloves and boots together with a mask must be used for floodwater cleanup specifically when dealing with unclean water or sewer water.
  • Avoid contaminated water: The water used to flood the area must be avoided because it might bear dangerous bacteria from storm sources or sewers and rivers.


What NOT to Do:

  • Don’t enter standing water if the power is still on.
  • Don’t ignore sagging ceilings or walls—they could collapse!

Step 2: Stop the Water at Its Source

You can’t fix the damage if water keeps flowing!

How to Find and Stop the Source:

  • Burst pipe? Turn off the main water supply valve (usually in the basement or near the water meter).
  • Leaky roof? Place buckets under drips and cover the roof with a tarp temporarily.
  • Appliance leak? Shut off the water supply to your washing machine, dishwasher, or fridge.
Pro Tip: Know where your main water valve is before a disaster strikes. Label it clearly for emergencies!

Step 3: Remove Standing Water – Fast!

The longer water sits, the worse the damage. Time to get rid of it!

Tools You’ll Need:

  • A wet/dry vacuum (rent one from a hardware store if needed).
  • Towels, mops, and buckets for smaller spills.
  • Sump pumps for severe flooding (available at home improvement stores).

How to Do It:

  1. Wettest locations such as basements should be the starting point for remediation.
  2. Direct the wet/dry vacuum towards absorbing maximum quantities of standing water.
  3. Mop or towel-dry floors, walls, and furniture.

Did You Know?
Just 1 inch of water can cause $25,000 in damage! Speed is your best friend here.

Step 4: Dry Everything Thoroughly

Water loves hiding in sneaky places (like under floors or inside walls). Stop mold by drying everything.

Drying Tools:

  • Fans: Position them to circulate air.
  • Dehumidifiers: These suck moisture out of the air.
  • Open windows: Let sunlight and fresh air help (if weather permits).

Focus on These Areas:

  • Carpets and rugs: Lift them to dry the padding underneath.
  • Furniture: Move couches, beds, and cabinets away from walls. Use wooden blocks to keep them off wet floors.
  • Walls: Cut small holes in drywall near the base to let trapped water escape (if damage is severe).
Pro Tip: Use a moisture meter (less than $20 online) to check if hidden spots like walls are truly dry.

Step 5: Clean and Disinfect – Mold’s Worst Enemy

Even clean-looking water can leave behind bacteria and mold spores. Don’t skip this step!

How to Clean Safely:

  • Scrub surfaces with hot water and dish soap.
  • Disinfect with a mix of 1 cup bleach + 1 gallon of water (never mix bleach with ammonia!).
  • Treat soft items: Wash curtains, bedding, and clothes in hot water. Throw away items that can’t be saved (e.g., soaked mattresses).

Mold Alert!

Mold grows in 24–48 hours. If you spot fuzzy black, green, or white patches:

When to Call the Professionals

Some jobs are too big (or too risky) to DIY. Call experts if:

  • The water is contaminated (e.g., sewage, chemicals).
  • Flooding covers a large area (e.g., entire basement).
  • You smell mold but can’t find the source.
  • Structural damage (e.g., warped floors, cracked walls) is visible.

FAQs About Water Damage Cleanup

Q1: Can I save my soaked wooden furniture?
A: Maybe! Dry it immediately, and rub wood oil to prevent cracking. If it’s warped, a pro might restore it.

Q2: Will my insurance cover water damage?
A: It depends. Most policies cover sudden damage (like burst pipes) but not floods. Check your policy and document damage with photos!

Q3: How long does drying take?
A: Typically 2–5 days with fans/dehumidifiers. Hidden areas (like insulation) may take weeks.

Q4: Can I use a hairdryer to dry walls?
A: No! It’s a fire risk. Use fans and dehumidifiers instead.

Q5: Is bleach safe for all surfaces?
A: Avoid bleach on wood, metal, or colored fabrics—it can damage them. Use vinegar for delicate surfaces.

Final Tip: Prevent Future Water Damage!

  1. Regular examination of your home includes inspection of pipes and roofs together with home appliances.
  2. Water alarms serve as early leak detectors through their affordable price tag of $10.
  3. Leakage from clogged gutters creates both roof leaks and damages foundation elements.

Bottom Line

Water damage is stressful, but you’ve got this! Follow these 5 steps to protect your home, your health, and your peace of mind. Remember: Quick action today saves thousands in repairs tomorrow.

Need help? Bookmark this guide, share it with family, and don’t hesitate to call Cavinsgroup for big jobs. Stay dry out there!